
The short answer
Choose one photo for Subject A and one for Subject B, preview the roles, select a video quality and submit once. When processing finishes, watch the entire result in My videos before downloading or sharing it.
Before you start: two photos and one clear goal
Use a separate image for each subject. For a person, choose an adult who has agreed to appear. For an animal, choose a photo that clearly shows its face and markings. Start with a pair you can easily distinguish; a group photo makes it harder to tell which subject should be used.
You do not need to write a prompt or upload a reference video to this page. The seaside sequence is already set. This is a fixed two-subject scene, so the form does not offer a new location, custom choreography or an editable shot list. If those are essential to your idea, this particular workflow is not the right fit.
1. Watch the example all the way through
Open the generator and play an example before choosing your photos. Notice the opening subject, the partner who joins the sequence, the close-ups and the final shared scene. Compare the input photos with the video, rather than judging it only by the poster frame.
Subject A is the opening role; Subject B is the partner. A and B are story roles, not permanent left and right positions. The camera can cut or reverse positions without changing which input belongs to a role.
2. Add your two subject photos
Upload one JPEG, PNG or WebP for each slot, up to 8 MB per image. Keep the face, hair outline and relevant clothing visible. Ordinary rooms and outdoor backgrounds are acceptable when the main subject is easy to see. A sharp, well-lit photo is more useful than a beautifully styled but tiny or obscured face.
To explore the form, tap a small sample photo to see it at a larger size. Choose “Use this photo” to fill that one subject slot. Opening a preview or choosing a sample does not start generation. Check both slots before continuing, especially if you changed only one photo.
3. Choose a quality that fits the job
For a first experiment with a new pair of photos, 480P is the lowest-cost option. It lets you judge whether both subjects remain recognizable through the scene changes. If the identities are wrong, increasing the resolution of the same result will not fix them.
The current purchase options cover one 28-second video each. 720P is resized from a 768P generation, while 2K uses an upscaled 768P result. Enhanced resolution is a delivery option, not a promise of better facial consistency. Taxes, where applicable, are shown at checkout.
| Output | Pack price | Credits used | Delivery |
|---|---|---|---|
| 480P | $9.90 | 3,250 | 854 × 480 |
| 720P | $19.90 | 3,830 | 1280 × 720; resized from 768P |
| 2K | $29.90 | 7,890 | 2048 × 1152; upscaled from 768P |
4. Sign in, review the cost and submit once
Sign in to your account and make sure your balance covers the displayed generation cost. If you need credits, choose a pack on Pricing and return to the generator. Selecting a resolution alone does not purchase a pack or start a task.
Read the photo-use agreement, confirm that it applies to your inputs, and press “Create my duet” once. Wait for a task to appear before trying again. A slow upload is different from a failed generation: confirm that both thumbnails have loaded and that the task was actually submitted.
5. Follow the task in My videos
Use My videos to check the submitted task and open its result when it is ready. Processing time depends on the service queue and the job; a quick example run is not a guaranteed delivery time for the next one. Avoid starting a duplicate simply because the first task is taking longer than expected.
If the browser loses its connection after submission, return to My videos and check for that task before submitting again. For a task that reports an error or a result that cannot be opened, keep its task identifier and contact support. Technical failure and an output you dislike are different issues; consult the refund policy for the applicable terms.
6. Review every scene before downloading
Our test renders sometimes looked convincing at the start but changed a hairstyle later, missed a distant partner or returned to an original-looking subject in the final scene. That is why a successful task status is only the beginning of your review.
Watch at normal speed once, then pause at each transition. Compare close-ups with the inputs, and check the wide shots too. A small person in the background can be missed if you only inspect the larger face in front.
- Opening: are both visible subjects consistent with the intended pair?
- Close-ups: do face shape, hairstyle and distinctive features stay plausible?
- Shared shots: are the roles still correct when both subjects appear?
- Final seconds: does either subject change back or suddenly change clothing?
- Playback: does the complete file open, and is the sound as expected?
Compare the photos with the complete result
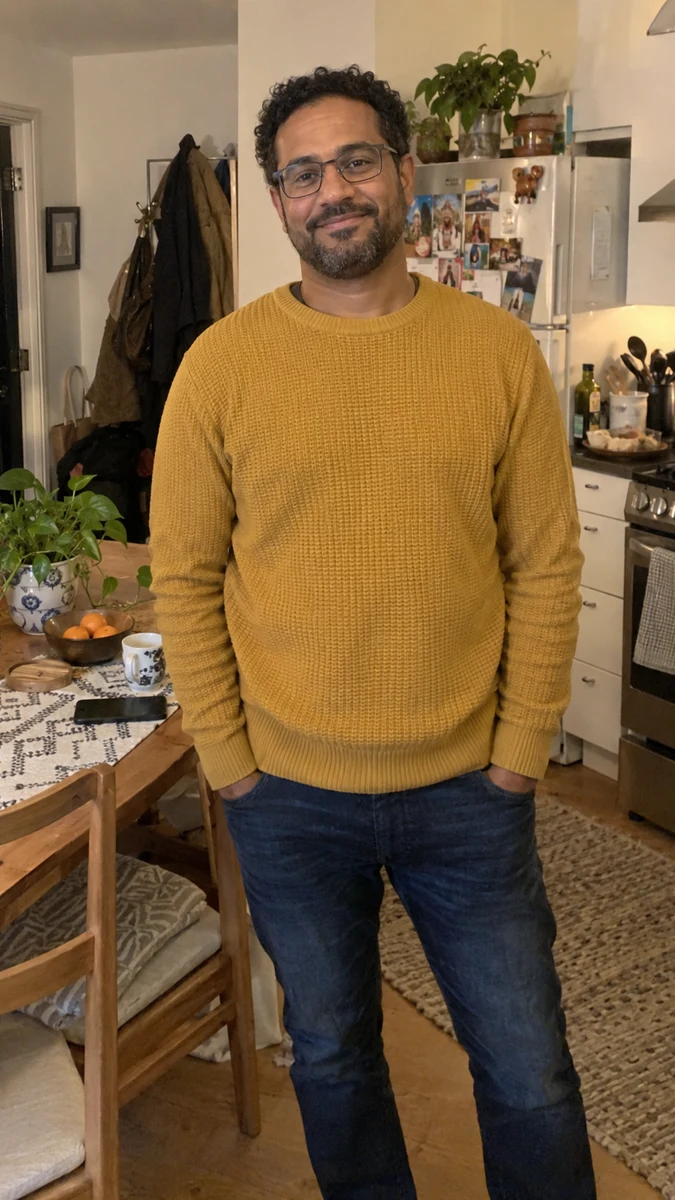
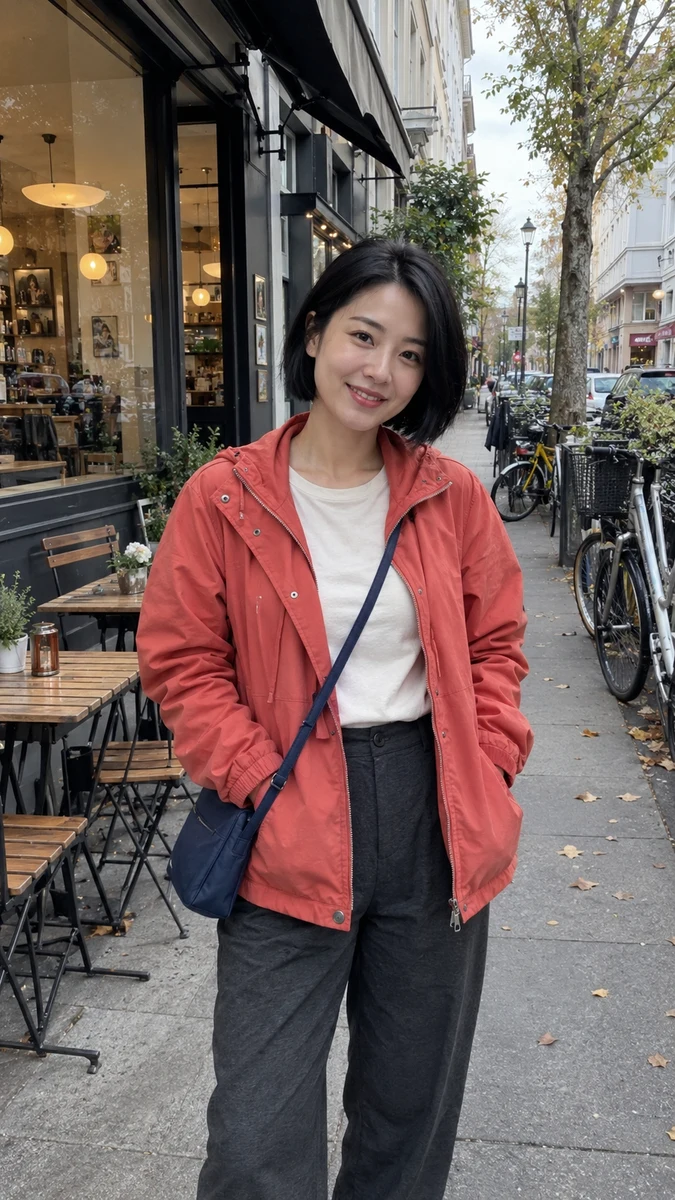
Example A uses two fictional adults in ordinary indoor and street photos. The 480P result shows why a plain studio background is not a requirement; it does not guarantee the same outcome for every upload.
Questions about how to make a rain dance ai video
Do I need a prompt or editing software?
No prompt is required in this generator. It creates the preset seaside sequence from your two photos. You may still use an editor to adapt the finished landscape video for your post.
Can I make the two roles swap places?
Choose the opposite photos for Subject A and Subject B before submission. This changes the input-role assignment; there is no need to interpret A and B as fixed sides of the screen.
Will buying 2K fix a wrong face?
No. Upscaling changes output dimensions. It cannot reliably repair the wrong identity, a changed hairstyle or a subject missed by the generation.
Is there a free full-video option?
The examples and photo previews are free to view. Generating your own full video consumes the credits shown in the form. Do not assume that choosing sample photos makes generation free.
Based on our own two-photo workflow tests and reviewed examples. Results vary by input and generation.
Ready to choose your cast?
Start with the two photos you want to use. Review the quality and credit cost before submitting.
Open the Rain Dance generator ↗Compare video qualities and pricing